Tote Bag
Level: Easy
Moderate if you make the bag yourself
Shopping bags, knitting bags, grocery bags, and tote bags are used by everyone
for everything under the sun. Another bag that I will tell you how to make
and decorate is called a Grandma's Bag. Most new grandmas will be thrilled
with this bag and use it for many things.
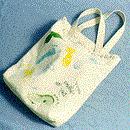
My daughter made me a Grandma's Bag on the first Mother's Day after my first
grandchild was born. It's a simple bag, but means so much. My grandson's
feet prints are colorfully placed all over the tote. It has been so much
fun to use it in my daily errands. Then I started using it when that first-born
boy was older and able to appreciate the things I held inside the tote. When
going to visit, I use my Grandma's bag to hold all the things that I have
collected to make my visit special. Sometimes it might be only the things
he has left behind at my house and a few new or borrowed books to read while
I'm visiting. It always holds a few treasures that I hide at his house after
I arrive so that we can go on a treasure hunt. He started knowing about this
treasure hunt when he was very little and the treasures were just barely
hidden at his eye level. Now that he is older the hiding of the treasures
has become more of a challenge. He now knows that this very special bag with
his baby footprints on it means that Grandma has brought some fun with her.
Supplies:
Tote bag Fabric and Thread (if making your own tote)
Handle strapping (optional) Fabric paints
Paper plates, soap, water and towels for baby clean up.
Step-by-Step:
1. Purchase a ready made canvas bag or make one following the easy instructions
in steps 2 through 7.
2. Purchase 3/4 yd. of light colored duck or canvas. The measurements of
the bag are optional, however, the bag I have measures 15 in. x 15 in. and
has two handles about 24 in. long.
3. Cut two pieces of fabric 16 in. by 18 in. and with right sides together
sew the bottom seam together (16 in. side).
4. Fold and press down a turned edge on each side opposite the seam you sewed
in step 3. This fold will be 1 or 2 inches from the raw edge. This will be
the handle end of the bag or the top edge of the bag. Don't stitch this edge
down yet.
5. From the remaining fabric cut two straps for handles (4 in. by 27 in.)
or purchase handle strapping from the fabric store. Choose a color that will
look nice with the color paints you are using in the final steps. Sew and
turn the handle strips and then position the handles and evenly space them
by measuring the width of the bag's cut pieces. Carefully pin them in place
and attach them to the bag panels with a loop at each edge of the pressed
end of the panel. If you purchased strapping then sew this on to the flat
surface of the bag over the bottom of the bag and the seam you sewed in step
3. When you sew the handles in place don't stitch them beyond the fold you
pressed in step 4.
6. Fold the fabric in half and sew the two opposite edges together including
the pressed down edge from step 4. After these seams are sewn then fold down
the top pressed edge and top stitch this hem in place. The handles could
be re-stitched when this top edge is stitched down to make them more securely
fastened.
7. If desired, it is possible to make a square bottom on the bag by turning
it wrong side out and stitching across the bottom seam in step 3 on each
end of this seam. This stitching makes the bag sit on the floor without falling
over and also allows the bag to hold more.
8. Now begin decorating your completed tote bag. Purchase small squeeze bottles
of fabric paint in two or three colors of your choice. Squeeze a small amount
of this paint onto a paper plate and spread the paint in a thin coating and
big enough to cover the length of the baby's foot. Carefully place the baby's
foot on the paper plate picking up enough paint to make a clear print when
pressed on the fabric. Test the first print on a piece of scrap fabric or
paper. You will need to adjust the amount of paint in order to print the
whole foot without smearing. Randomly print the feet all over the tote bag
and then change colors and print again. The patience and age of the baby
will determine how much and how many colors of paint you will be able to
use. You will want to do the hands also but this will become impossible because
most babies won't keep their hands open enough to print them. It's best to
do this in two stages because of drying the bag before starting the other
side. Hope the baby cooperates! No grandchildren? Then do dog or cat prints
on the tote bag instead.